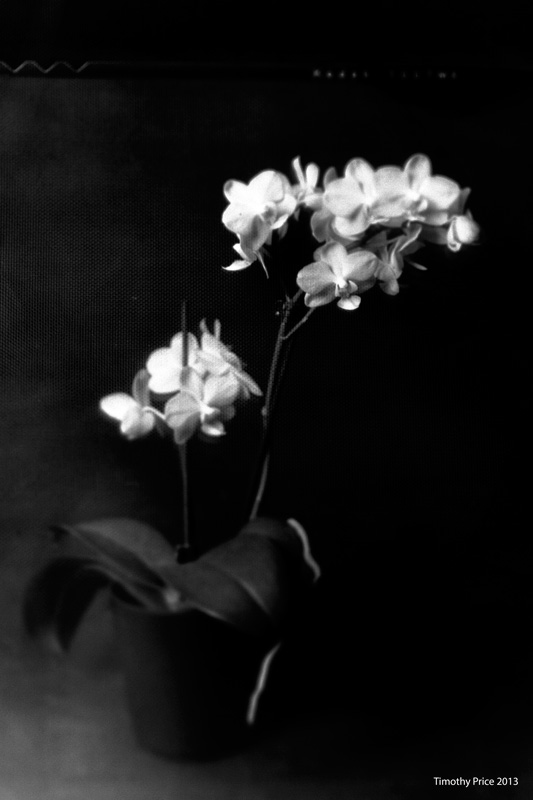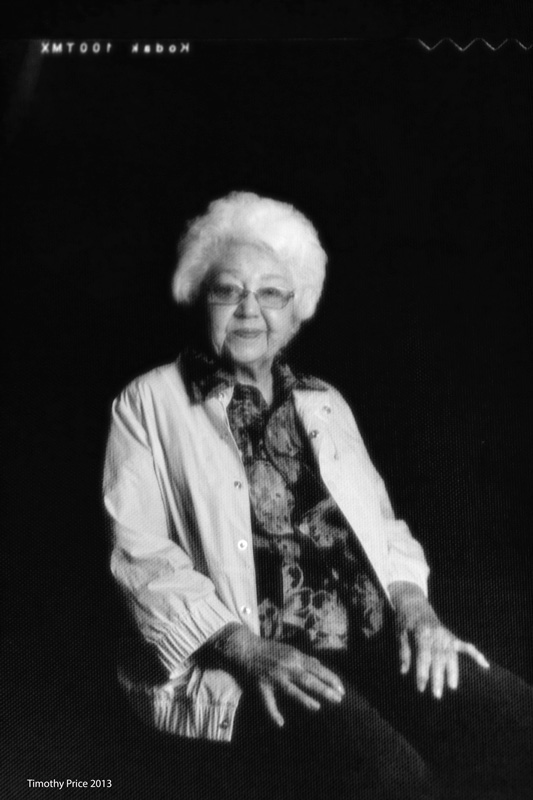
“Develop before 10/2004” is printed on the box… http://photos.tandlphotos.com/blog/2016/9/old-film-and-a-macro-lens
“Develop before 10/2004” is printed on the box… http://photos.tandlphotos.com/blog/2016/9/old-film-and-a-macro-lens
And now for something completely different. http://photos.tandlphotos.com/blog/2015/12/the-window-in-my-dreams-t-12-days
Blocked view and an art show: http://photos.tandlphotos.com/blog/2015/10/the-view-is-gone
Photo of the Day, Etc for the week of March 23rd — 29th includes:
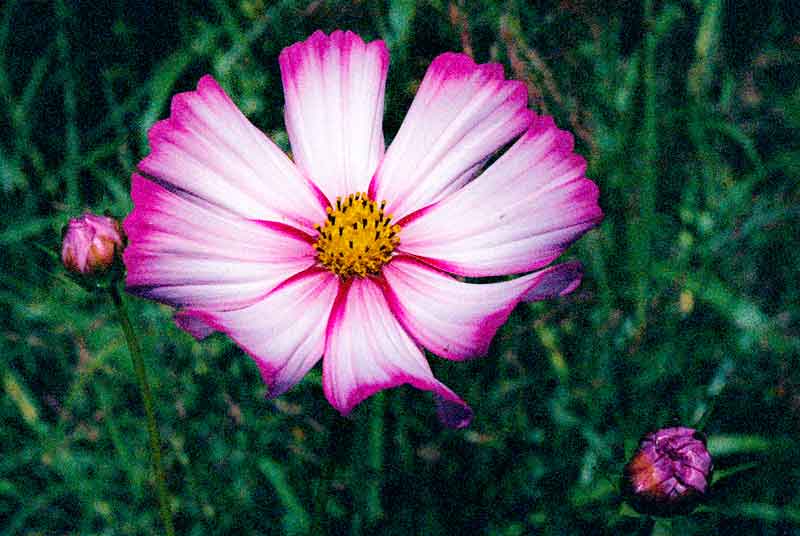
March 30th: Spring flowers and wild boar macaroni — http://photos.tandlphotos.com/blog/2015/3/flowers-food
March 31st: Spunk in the window — http://photos.tandlphotos.com/blog/2015/3/screened
April 1st: Construction — http://photos.tandlphotos.com/blog/2015/4/construction-progress
April 2nd: Spunk gets his kitty prints — http://photos.tandlphotos.com/blog/2015/4/kitty-prints
April 3rd: Moonrise and Lola — http://photos.tandlphotos.com/blog/2015/4/moonrise-lola-and-the-neon-tulip
April 4th: A snaky lick and wild turkey — http://photos.tandlphotos.com/blog/2015/4/snake-tulips-wild-turkey
April 5th: Flower girl — http://photos.tandlphotos.com/blog/2015/4/i-love-the-flower-girl
Last week’s daily photos found some nice surprises, especially with the kittens trying their paws at film photography. Photo of the Day, Etc for the week of March 23rd — 29th includes:
March 23rd: The kittens, especially Spunk, get into old-fashioned film photography — http://photos.tandlphotos.com/blog/2015/3/when-kittens-take-up-photography
March 24th: White tulips — http://photos.tandlphotos.com/blog/2015/3/yesterday-today
March 25th: Another personal record and a happy kitty — http://photos.tandlphotos.com/blog/2015/3/02-48-20-on-the-48th-climb
March 26th: Spunk tries paw, tooth and nail at developing film — http://photos.tandlphotos.com/blog/2015/3/spunk-does-film
March 27th: Morning Angel — http://photos.tandlphotos.com/blog/2015/3/angel-of-the-morning-angel
March 28th: Smoke and personal records — http://photos.tandlphotos.com/blog/2015/3/smokin
March 29th: Spunk has positive reviews of his negatives — http://photos.tandlphotos.com/blog/2015/3/positive-notes-on-negative-development
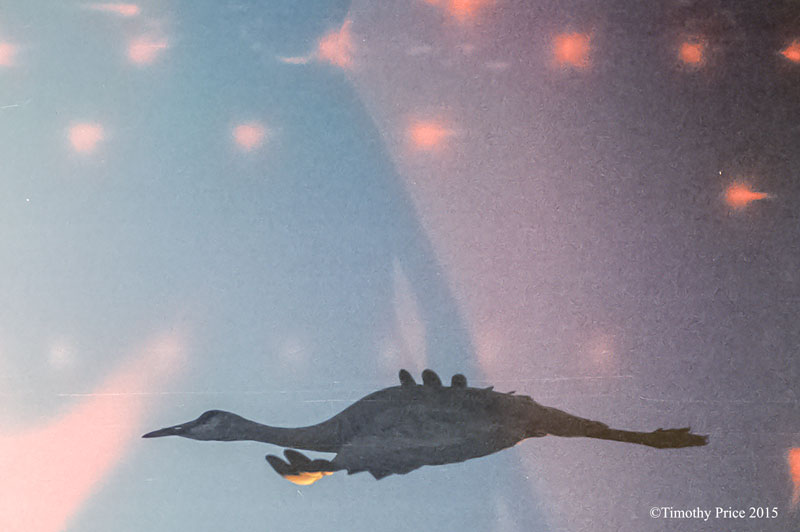
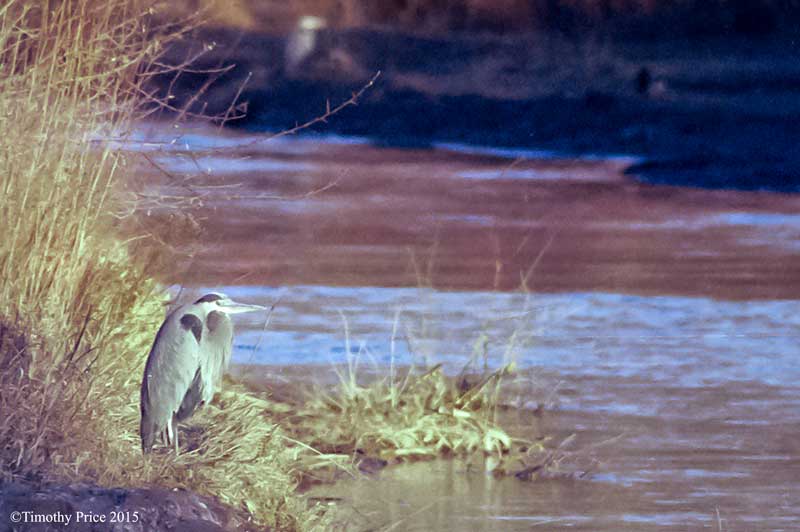
I bought some Cine Film re-engineered for 35mm to be developed by standard C41 process. This is a high speed tungsten film normally used for cinematography. I had put the roll of film in my Canon F1 intending to shoot film along with digital of the fashion show at Gears & Glamour. However, since the fashion show was in the dark, and I hadn’t worked with the film before, I didn’t want to push it beyond its recommended ISO 800 until I had used it. Since this film is best used indoors or at night under tungsten street lighting, I only took a few shots in the well lighted prep area at Gears & Glamour, a few more at the West Side Chorale’s winter concert, and then decided to use it outdoors with a 600 mm lens. I knew the color would be off in daylight, but I wanted to see how well I could hand hold a 600 mm lens with high speed film.
I got a surprise when I got to the end of the roll of film. I noticed the advance didn’t stop, and when I tried rewinding the film, the knob turned freely. I advanced the film a couple more times to see it would stop — it didn’t, so I took the camera into the darkroom, opened it in the dark and carefully felt by the take-up spool, and discovered the film had not been secured to the spool in the canister. I took out the canister, and as carefully as I could opened it up with a can opener. I carefully pulled the film out of the camera, but when the last of it popped off the take-up spool, the coiled mess of film slipped from my hands and fell to the floor. Remember, I’m in total darkness, so I bent down, felt around at my feet, found the pile of film, gently picked it up, found an end to the film, found the spool from the canister and rewound the film back onto the spool. I put the spool back in the canister and forced the end cap back onto the canister. When I got the negatives back, the canister didn’t seal back up tightly around the edges after opening it (I had suspected as much), so the last frames on the roll had light leaks. This was a mystery, because the last frames should be on the inside of the spool and the first frames on the outside where they would be affected by light leaks in the seal around the outer edge of the end cap. Then I remembered dropping the film, so I must have rolled it back on the spool reverse of how the photos were taken.
The lead photo is frame 24, the last image taken, and the effect of the light leaks from being on the outer edge in the canister are pretty interesting. The rest of the images, shown in order taken, were not affected by the leaks on the edge of the canister.


Continuing my adventures in film, I purchased a 4X5 Speed Graphic, Press Camera with money I got for my birthday. I wanted a 4X5 that was more portable, but since field cameras are still pricey, I started looking at press cameras, and decided I liked having the choice of using either the leaf shutter in the lens or the focal plane shutter in the body, and having the option to hand hold the camera.
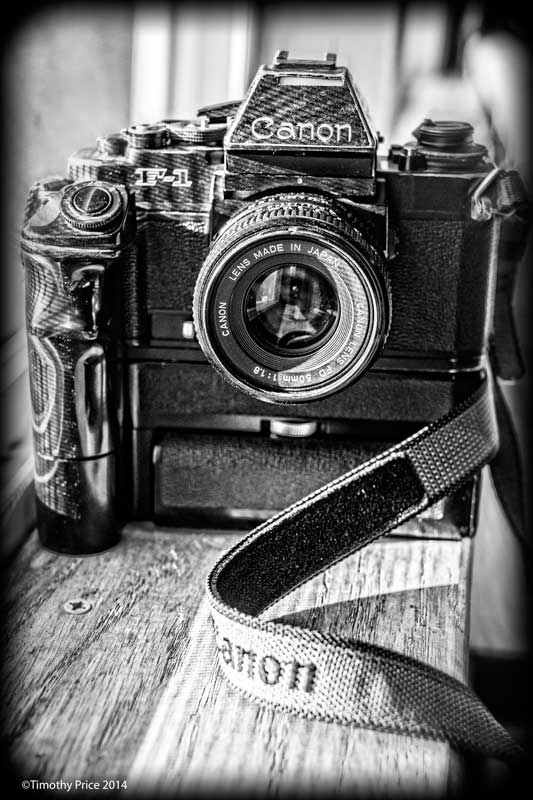
I ended up with this particular camera because the seller guaranteed that everything worked, and he accepted my offer for the amount of the money I received for my birthday. I got it Wednesday, checked the shutters, the movements, the rangefinders, and indeed everything worked. It was pretty dirty, including the lens, so I took the camera and lens apart, and cleaned everything inside and out. Spunk helped and then participated when I photographed the camera — he wanted to point out the camera’s features and how it works. I looked up the serial numbers on the lens and the camera and it’s a Wartime model produced in 1945.
Thursday morning I went out and took four photos, processed them, and then printed two of the negatives before we went to Thanksgiving dinner at Laurie’s parent’s house in the early afternoon. I used Kodak Tri-X 320, but had the light meter set at ISO 400 and processed the film at ISO 400. I used the leaf shutter in the lens set at 1/400 sec and hand held the camera for the shots. The lens, at 127mm, is fairly wide-angle for a 4X5, therefore, in each photo I was trying to get as close to a group of cranes, and then a group of ducks as possible. The cranes and ducks flew so I snapped the photos of them taking flight, producing my first 4×5, hand-held actions shots.


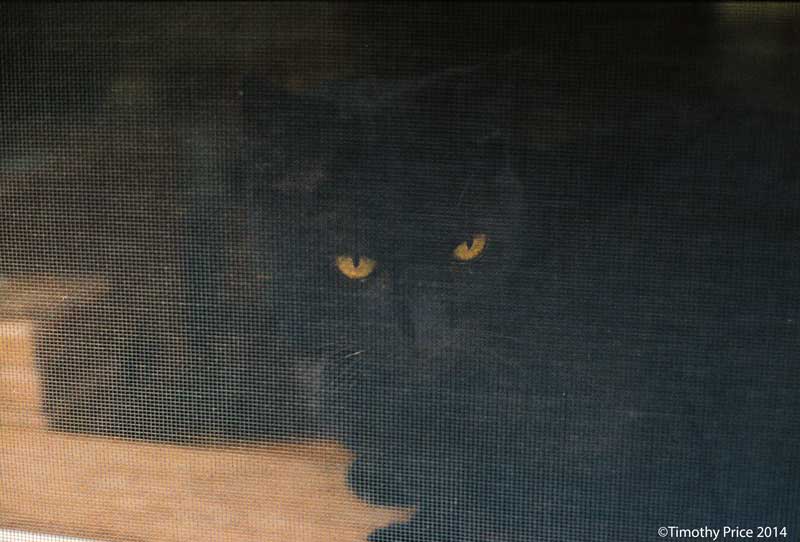
I bid on this Canon F-1 on ebay, it was cheap, and I was expecting to be outbid because Canon F-1s are popular cameras on ebay. I forgot about it until I got an email that I won the bid seven days later. The camera looks rough with a lot of brassing, a few dents and a few dings, but it works great and the light meter is right on accurate. It has a motor drive, which is really cool — “chunka, chunka, chunka…” at five frames per second when I hold down the shutter release. Interestingly enough, the F-1 will not trip my studio flashes or modern flashes, but it has no trouble tripping my old Metz CT-60 flashes. I included four photos that are scans of negatives taken with the F-1.
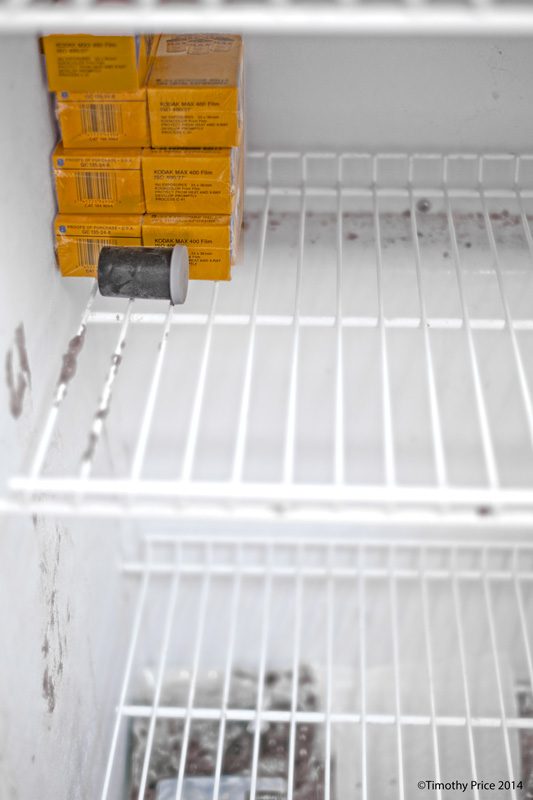
I was downright domestic and quite handy all weekend. I made a double batch of pork roast with potatoes, carrots and celery to get some food stocked up in the freezer. I had a stark reminder about how busy we’ve been when I opened the door to discover I had more film than food in in the freezer — it was definitely time to do some cooking.
I also finished organizing the catio, and got the rest of the stuff out of the armory, and started preparing to build a darkroom. I ordered a walk-thru cylindrical revolving darkroom door, which should arrive in a couple of weeks, and started drawing lines on the carpet to mark out where the walls and cylindrical door will go.
The nature of remodeling projects is that I always have to deal with deferred maintenance as part of each remodeling project, so I repaired the roof on the armory, and then put re-purposed corrugated steel on the exterior, south-facing wall to cover up the deteriorating exterior wall board that’s been blasted by the sun for the past 24 years. I also covered up the window in the south wall, since I don’t need a window in the darkroom. The re-purposed corrugated steel gives the south wall of the armory a colorful, ghetto-like look between the white and silver pieces, and the rusty spots.
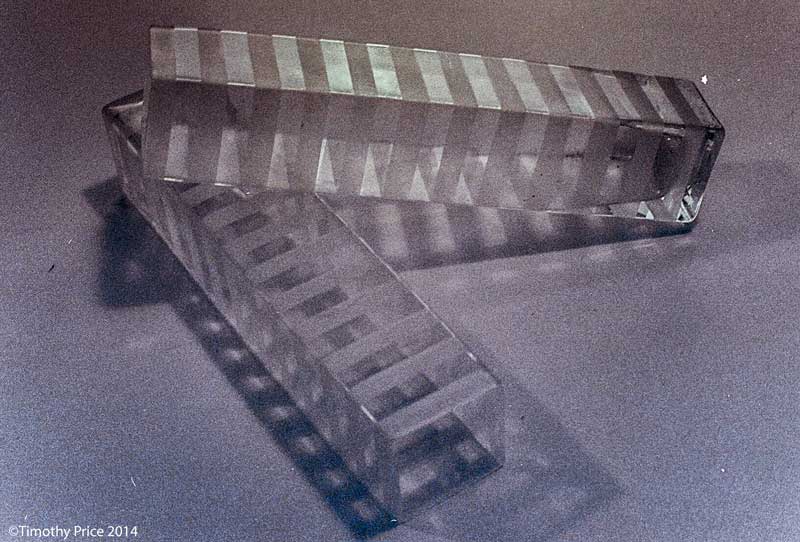
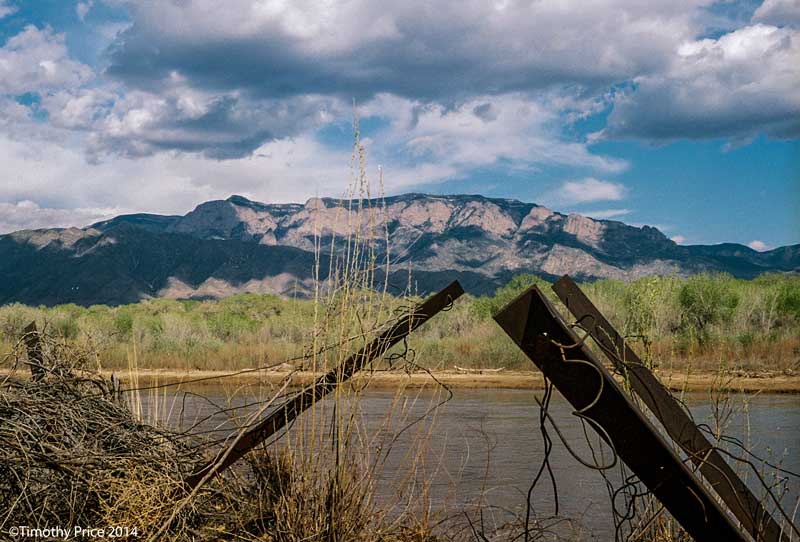


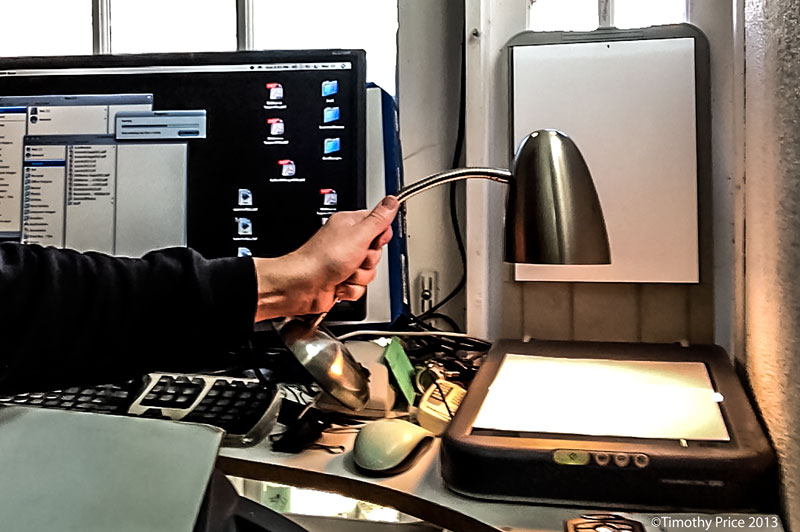
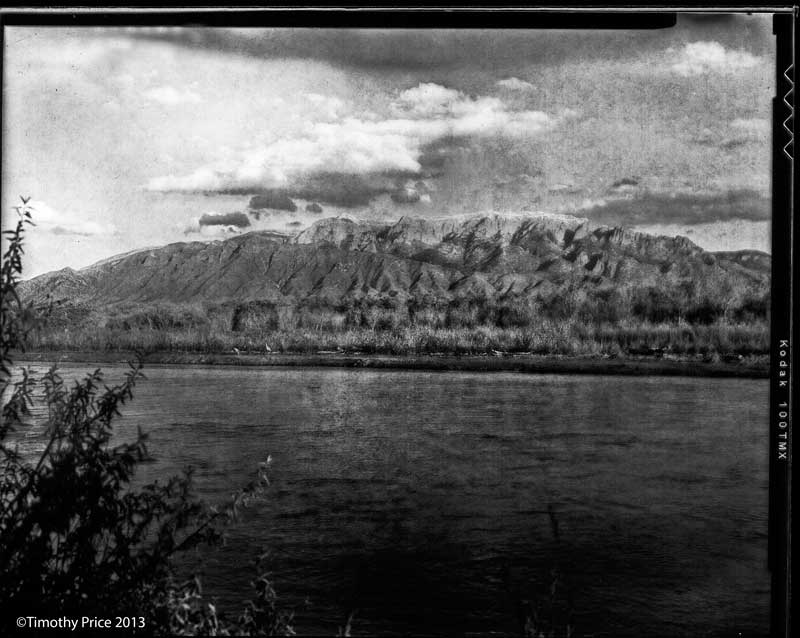
I processed a batch of 4X5 negatives I took of the Sandias and a railroad bridge with my 4X5 view camera over the past few weeks. Since I don’t have a scanner that is made to scan 4X5 negatives, I did “ghetto scanning” of the negatives by making a film holder out of a sheet of card stock, placing the holder and a negative on my old Epson 1260 scanner, placing a sheet of paper over the holder and negative, and holding a lamp with a 25 watt light bulb over the paper the negative is under as a back light while scanning the negative. The scanner is set for reflective scanning, so it doesn’t quite focus on the negative with a backlight, but the process sort of works, giving the resulting images a vintage look.
Since I’m still learning how to process 4X5 film using a daylight processing tank, when I first pulled the negatives out of the tank after the final rinse, they were purple in the middle. Oops! I hadn’t fixed them quite long enough, and I needed to agitate the tank more during the fixing process. So the negatives went back into the tank for another round of fix with more aggressive agitation. After another round of hypo-clearing agent and another rinse, all the purple was gone, but the double round of fixing left the negatives a bit uneven.
Then there’s the issue that the lamp I’m using for the “ghetto scanning” doesn’t fully cover the negatives, so I get bright edges on the images in the resulting scans. I did a little “burning” around the edges in Photoshop to even things out, which worked a pretty well on some images, and didn’t make much difference on others.


I got a 4X5 view camera and lens on ebay, and I had ordered an adapter that was supposed to allow me to use my Canon bodies on the 4X5, moving the adapter around to six different positions to cover most of the view area on the 4X5. Then I would have stitched the six images together to make the final photo. The adapter didn’t fit right so it couldn’t move through any of the positions, which was useless, so I returned the adapter. I was going to return the 4X5, but then I thought, “what the heck” and decided to keep it and do some film again (I used a 4X5 view camera exclusively when I was a photo student in the early 1980’s).
I mixed up chemicals this morning, and using a daylight changing bag, I loaded negatives I had taken a couple of weeks ago into a daylight processing tank. I processed my first test negatives in the kitchen sink this afternoon, and hung them over the sink to dry. It was fun and nostalgic being a photo-chemist again — measuring and mixing the developer, fixer and hypo-clearing agent, getting the developer to the right temperature, agitating the tank at minute intervals while the developer did its magic, followed by the stop bath, fixer, hypo-clearing agent and final rinse. All the time there was much anticipation with some anxiety about the results, as it was the first time I had processed 4X5 sheet film in almost 30 years.
The negatives are not too bad, but negatives look like negatives, and since I currently do not have a scanner that can scan 4X5 negatives, I photographed them on a soft box, then reversed two of the images into positives that are displayed below. The first photo of each pair is a shot of the emulsion side of the negative, which is not as reflective, but the images are reversed. The second photo of each pair is a shot of the negatives turned over so I’m shooting the shiny side of the negative. In all the photos below, my macro lens picked up the texture of the fabric cover on the soft box, so you can see texture in parts of the photos. The emulsion side of the negatives was easier to photograph because there was less glare, allowing the black background to be black. I had to hold the camera at a different angle to reduce the glare on the shiny side of the negatives as much as possible, which also created a much shorter depth of field on the second photo in each pair.